Import participants
Import the list of participants from Excel, from emails or from a group, even without email addresses.
Written By Florian Barral
Last updated 9 days ago
Enroll participants in the Assign › Students tab. Papeez uses this list to print nominative copies, to match anonymous copies after the scan, and to email convocations and grades.
Add participants
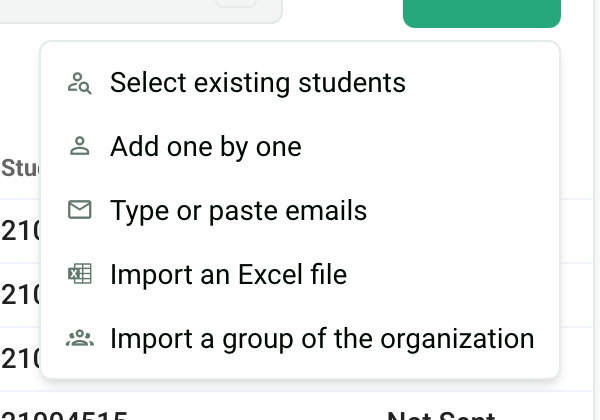
Click Add, then choose a method:
Import an Excel file: the whole list at once, from the template provided.
Type or paste emails: paste a list of addresses, separated by a space, a comma or a semicolon.
Add one by one: first name, last name, email and student ID of each participant.
Import a group of the organization: all the members of one or more groups already created in your organization.
Select existing students: people already in your organization, found by name or email.
Enroll everyone before generating the copies: in nominative mode, Papeez prints one copy for each participant on the list. In anonymous mode, the student ID is used to match each copy. See Nominative or anonymous copies.
Import an Excel file
Click Add › Import an Excel file.
Click Download a sample Excel file to get the template.
Fill in one row per participant, without changing the header row.
Drop the file in the import area, or click it to choose the file.
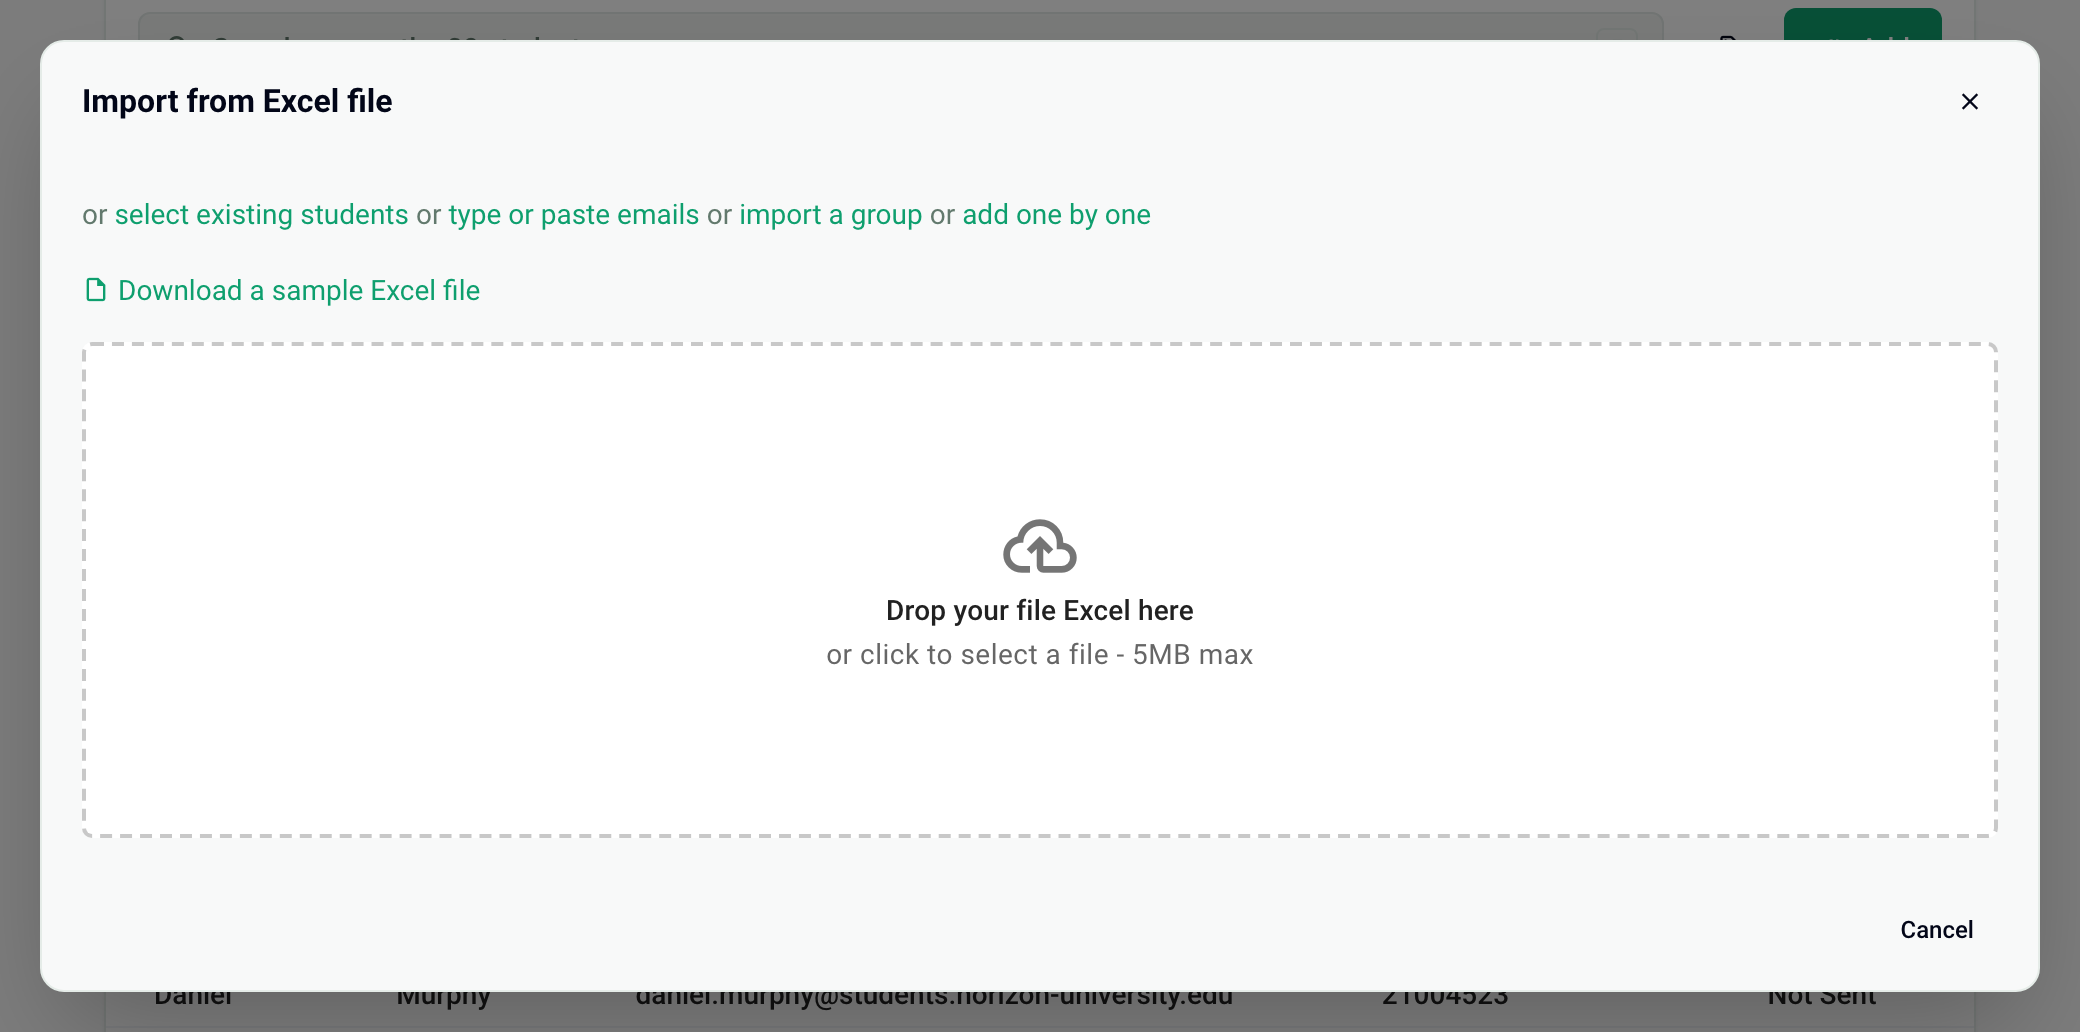
The file must be in .xlsx, .xls or .csv format, and 5 MB at most. The template columns:
Keep the headers on the first row. They can be in English or in French, upper or lower case. If the file contains other columns, Papeez offers to add them as custom attributes of the exam, or to ignore them.
The file is rejected
Papeez imports the whole file or nothing: a single row with an error blocks the entire import. Check:
The emails: each row needs a valid address, with no spaces, no accents and no empty cells.
The first row: it must contain the column headers, not a participant or a document title.
The format: .xlsx, .xls or .csv, 5 MB at most. When in doubt, start again from the template.
Participants without an email address
An email is required to enroll a participant. If your participants have none, give each one a unique dummy address, for example firstname.lastname@your-school.edu. They will receive neither convocation nor grade by email: give them the instructions on paper.
Each participant needs their own address: two rows with the same email make a single participant. Never use your own account's address: the row enrolls no one and replaces your account's name with the one on the row.
Organize participants into groups
From an Excel file: fill in the Groups column.
From a group of the organization: imported participants are placed in a group with the same name.
From the list: select participants, then click Add to a group or Remove from a group in the bar that appears.
The same bar lets you Export the selection (see Export enrolled participants), Send convocation or Delete participants.
Frequently asked questions
Can I add a participant after generating the copies?
Can I add a participant after generating the copies?
Yes. In nominative mode, they have no copy with their name: Papeez shows in Print › Generate copies that the number of participants has changed and that the copies must be generated again. In anonymous mode, just enroll them; if their copy is already scanned, match it: see Match a copy to a participant.
My account name changed after an import
My account name changed after an import
The file contained your account's email address. Fix your name in your profile, then remove that row from the file.
I can't find the group to import
I can't find the group to import
Organization groups are managed by the academic staff of your organization: ask them to create the group, or import the list from an Excel file.
Was this helpful?
Still need help? Ask the team